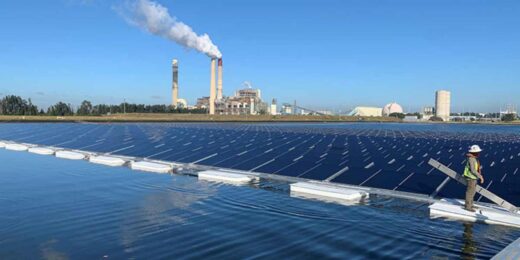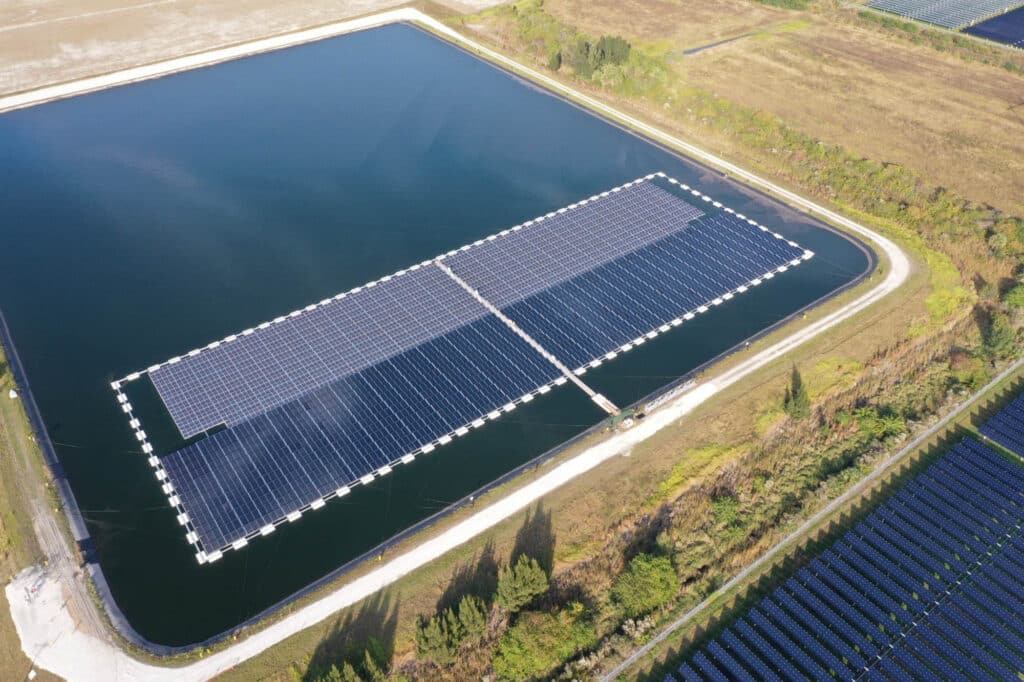
What if the answer to our energy challenges was hiding in plain sight—right on the surface of our water? Floating solar farms are one of the most innovative solutions emerging in the renewable energy sector today. As land becomes increasingly scarce and expensive, energy developers are turning to the vast surfaces of lakes, reservoirs, and ponds to meet growing electricity demands. Floating solar farm construction allows projects to conserve valuable land for agriculture, housing, or natural habitats while also taking advantage of the cooling effect of the water, which helps improve panel efficiency.
Beyond land conservation, floating solar systems can reduce water evaporation, provide opportunities for dual use of reservoirs, and even create new economic pathways for utilities and municipalities. However, building floating solar panels requires a different set of skills, materials, and engineering considerations than traditional land-based projects. From site selection and anchoring to electrical integration and long-term maintenance, every stage must be carefully planned and executed to ensure safety, reliability, and performance. In this blog, we’ll walk you through a step-by-step guide to building floating solar panels, covering everything from design to installation and upkeep.
Step 1: Feasibility & Site Selection
Selecting the right water body is foundational. A mis-choice here will lead to insurmountable challenges later.
Successful floating solar installations have been deployed on reservoirs, irrigation ponds, industrial cooling ponds, water treatment facilities, and even reclaimed quarries worldwide.
Identify Potential Water Bodies
- Reservoirs, irrigation ponds, industrial cooling ponds, lakes, water treatment ponds, quarries, etc.
- Ideal water bodies are tranquil, with minimal wave action and regulated levels.
Bathymetry and Depth Survey
- Perform a bathymetric map of the site to understand depth contours, underwater structures, and constraints.
- Aim for a fairly uniform depth or manageable depth variations so that anchoring and float systems are easier to design and implement.
Water Quality and Chemistry
Understand seasonal temperature fluctuations and how they affect buoyancy and thermal expansion.
Hydrodynamics, Wind, Wave, and Current Studies
- Model wind speeds, wave height, fetch (distance over which wind acts), and currents during worst-case conditions (storms, overflow, downstream flow).
- Ensure that waves or currents will not unduly stress floats or anchors.
Sun Exposure and Shading Analysis
- Assess how sun angles vary over the year.
- Evaluate shading from surrounding terrain or structures.
- Carefully consider the albedo effect (reflection) from the water and the resulting shadows the floating structure will cast, which can impact both array performance and aquatic life below.
Environmental and Regulatory Assessment
- Check aquatic ecosystem sensitivity (flora, fauna, fish migration, algae, bird habitats).
- Obtain any required permits (environmental impact studies, water usage rights, grid interconnect permits).
- Consult local, regional, or national agencies (water management authorities, environmental agencies).
Access Logistics and Infrastructure
- Ensure the site is accessible for bringing in materials, cranes, barges, and maintenance crews.
- Proximity to grid connection points (substation, transmission lines) matters — the further away, the higher the cost for cabling and transformers.
Cost and Risk Analysis / Financial Modeling
- Estimate capital expenditure (CAPEX), including floats, anchoring, cabling, civil works, permitting, and grid tie.
- Estimate operations & maintenance (O&M) costs over the lifetime.
- Run sensitivity analysis against risks (water level variation, extreme storms, equipment failure).
Once site feasibility is confirmed and permits are secured, you can move on to design and engineering.
Step 2: System Design & Engineering
This step translates your feasibility work into engineered plans and technical schematics. Proper floating solar farm construction requires detailed engineering at every stage.
Modern float platform design has evolved significantly through engineering innovations, with manufacturers now offering HDPE, closed-cell foam, marine-grade aluminum, and advanced composite materials.
Select Float Platform Types
- Common materials: HDPE, closed-cell foam, marine-grade aluminum, high-density plastic, or composite materials.
- Determine float size, buoyancy margin (safety factor), spacing, and redundancy.
Structural Design of Frames and Crossbeams
- Design frame rails, connectors, and joints.
- Account for thermal expansion, vibration, dynamic loads (wind, wave, load from panels).
- Use corrosion-resistant materials or coatings (AccuSolar uses marine-grade aluminum frames with stainless steel connection hardware).
Module Mounting Systems
Ensure that duplicate mounting is tolerant to flex and small movement due to float articulation.
Anchoring and Mooring System Design
- Anchoring strategy depends on water depth, bottom soil type (mud, rock, sand), and hydrodynamic forces.
- Define anchor spacing, mooring line length, allowed slack, dynamic tension, redundancy, safety factors.
Cabling, Inverters and Electrical Balance of System (BOS)
- Plan underwater cabling: conduit protection, routing.
- Design string layout, combiner boxes, inverters, transformers, junction boxes.
- Ensure compliance with electrical codes (insulation, grounding, protection devices).
- Consider voltage drop losses, transformer sizing, and fault protection.
Gangway Access, Walkways and Safety Features
- Include walkways, gangways, catwalks, platforms for maintenance.
- AccuSolar’s base frames include a 17.5-inch wide walkway for easy access to every module. For overall array access and clean cable management, optional aluminum gangways and ramps connect the array directly to land, offering a dry path for all electrical cabling.
- Consider boat docking or floating docks for service vessels.
Thermal, Hydrodynamic and Fatigue Analysis
- Model how the system will respond to thermal expansion, wave loads, cyclic stresses.
- Simulate extreme events (storms, waves) to ensure fatigue life.
- Incorporate safety margins—most systems target 20–25 years of operation.
Detailed Construction Drawings and Tender Documents
- Produce detailed mechanical, structural, civil, and electrical drawings.
- Prepare bill of materials, supplier lists, cost estimates.
- Issue RFPs (requests for proposals) to contractors, firms specializing in floating solar.
Once your design is approved and contracts awarded, move on to procurement and preparation.
Step 3: Procurement & Pre-Assembly
Before arriving on site, a lot of work happens off-site to streamline the assembly phase.
Order Floats, Structural Materials, Connectors, Hardware
- Source float modules, rails, fasteners, joints, seals, etc.
- Make sure all components meet marine-grade or outdoor-rated specifications suited to water exposure.
Procure Solar Modules, Inverters, Transformers, Electrical Components
- Select PV modules (bifacial) with good warranties, low degradation.
- Inverters should be robust and suitable for remote, wet, and possibly humid environments.
- Include spare parts, spare cables, replacement connectors.
Pre-assemble Modular Sections
- Construct subassemblies (float + frame + mounting rails) in a yard near site—or at an offsite assembly facility. (At AccuSolar we pre-assemble base frames with the floats.)
- The more pre-assembly you can do, the less work that needs to occur on water under challenging conditions.
Test Fitment and Quality Checks
- Dry-fit mechanical assemblies, check tolerances, clearance, bolt holes, alignment.
- Conduct water tightness or buoyancy validation tests on sample floats.
- Verify materials (coating integrity, sealing, fasteners) meet specs.
Logistics and Staging
- Transport components to the site, staging them near the shoreline.
- Prepare cranes, barges, floating platforms, boats, and lifting equipment.
- Secure necessary marine equipment (tugboats, barges, floating cranes).
Once everything is in place, you’re ready for the on-water construction.
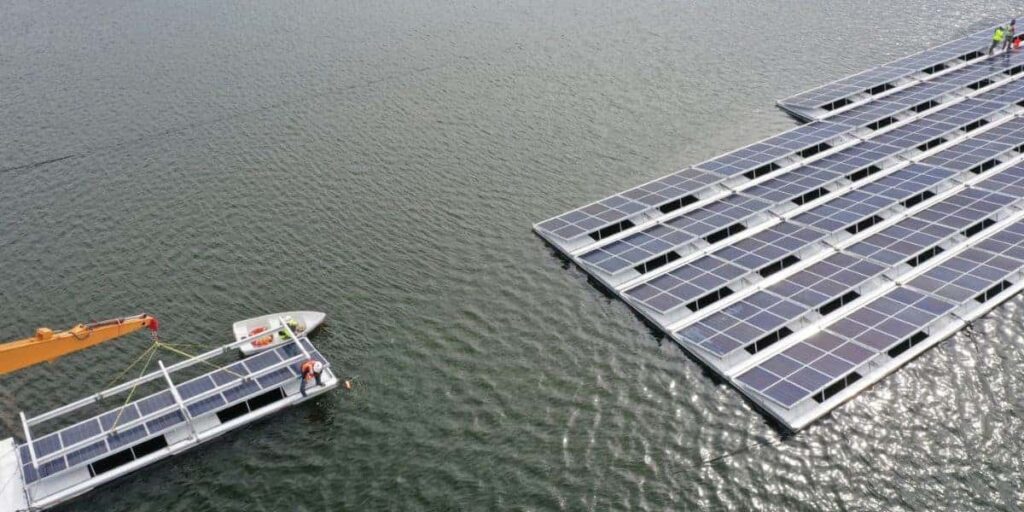
Step 4: Installation & Assembly on Water
This is where the floating solar farm gradually comes to life. Safety, alignment, and sequencing are critical when building floating solar panels on site.
Launch Floats / Float Modules
- Move floats from the shore onto water (via crane, barge, temporary launches).
- Position floats roughly in their intended formation, but loosely anchored initially.
Assemble Frame Structure on Floats
- Bolt or weld rails, cross-members, stiffeners onto floats in situ.
- Use jigs or alignment tools to maintain flatness and uniform spacing.
- Check that modules align, tolerances are maintained, and frames are level (within acceptable tolerances).
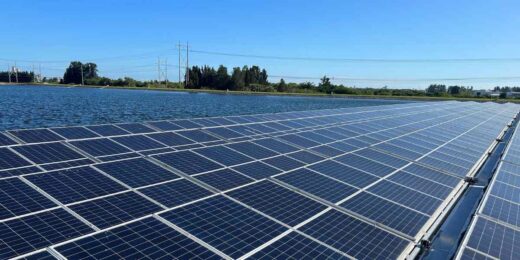
Install Solar Modules onto Frame
- Mount solar panels onto the frame using clamps or bolts.
- Orient and tilt modules correctly (as per design) for optimal solar exposure.
- Torque fasteners to specified values, including thermal expansion allowances.
- Include bonding/grounding between frames and modules as required by electrical codes.
String Wiring, Combiner Boxes, and Cabling
- Run module-to-module wiring, route it through cable trays or conduits.
- Fuse and connect to combiner boxes, then feed main cables toward inverters/transformers.
- Use sealing glands, strain-relief clamps, and protection for cable runs.
- For underwater cable, laterals are needed; temporarily float or support them until final connection.
Anchoring and Mooring Adjustment
- Attach mooring lines and anchors from float corners or designated points.
- Apply pre-tension or slack as per design.
- Use winches or tensioners to gradually bring the system into stable positioning.
- Monitor tension shifts, alignment drift, and adjust as needed.
- Confirm that the float array remains within design tolerances under wind/wave loading.
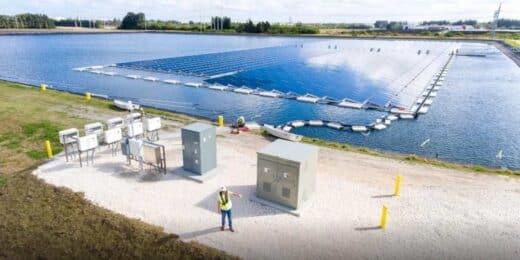
Final Electrical Installation and Grid Tie
- Set up inverters, transformers, switchgear, protection devices.
- Test grounding, insulation, earth leakage, overcurrent protection, etc.
- Integrate with grid transformer and substation connection.
- Perform commissioning tests (megger tests, I-V curves, commissioning runs).
Commissioning and Performance Validation
- Monitor performance, check that modules are generating expected output.
- Validate string-level performance, check for hot spots, shading, reflection.
- Fine-tune alignment or tilt (if allowed) and commissioning thresholds.
- Document all as-built changes and calibrate monitoring systems.
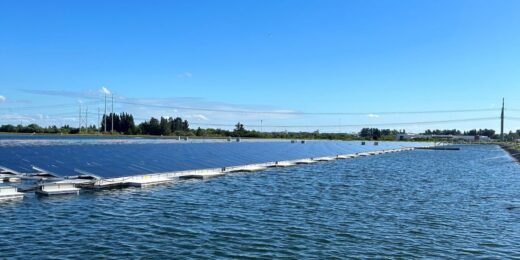
At the end of this phase, your floating solar farm is live and producing electricity.
Step 5: Operation & Maintenance (O&M)
Sustaining performance over decades is the final and long-term phase of success.
Implementing comprehensive maintenance protocols from the start helps protect your investment and maximize energy production over the system’s 20-25 year lifespan.
Routine Inspections and Preventive Maintenance
- Inspect floats, structural frames, fasteners, and connectors periodically (quarterly, semiannual).
- Look for cracks, corrosion, loosening, fatigue or mechanical damage.
- Check seals, gaskets, expansion joints.
- Inspect electrical components (junction boxes, combiner boxes, wiring).
Cleaning and Module Washing
- Clean solar module surfaces to remove dust, bird droppings, or algae.
- Use appropriate cleaning method (soft brushes, deionized water, robotics) so as not to scratch surfaces.
- Consider Automated cleaning systems. Though more costly upfront, they are an ideal, low-labor solution for large-scale floating solar systems that need frequent cleaning, and should be integrated into a comprehensive maintenance program.
- Schedule cleaning frequency depending on local environment.
Float Maintenance and Buoyancy Checks
- Ensure floats remain watertight, buoyancy is stable, no water ingress.
- Repair punctures, cracks, or damaged float segments.
- Replace or reinforce floats that show fatigue or excessive aging.
Anchoring / Mooring Line Maintenance
- Monitor mooring line tension, inspect for wear, corrosion, abrasion.
- Check anchors, fittings, connectors for loosening, corrosion, or movement.
- Adjust tension if seasonal water levels change, or corrective alignment is needed.
Electrical System Upkeep
- Monitor inverter health, replace failed units or modules.
- Inspect cabling for insulation damage, water ingress, rodent bites, chafing.
- Check junction boxes, connectors, and sealing.
- Maintain monitoring systems, data loggers, SCADA system, and alarms.
Performance Monitoring and Analytics
- Use real-time monitoring to detect dips, mismatches, shading, or degradation.
- Analyze output trends annually to forecast long-term degradation.
- Use predictive maintenance: identify modules or strings underperforming and isolate them early.
Periodic Major Maintenance or Refurbishment
- Retrofit module replacement, inverter upgrades, or re-tensioning of mooring.
- Inspect and reinforce for corrosion or aging beyond original design.
Safety and Emergency Procedures
- Maintain safety protocols (life vests, rescue boats, ladders, fall protection).
- Prepare for extreme events (storms, floods) by defining safe shutdown procedures, float locking, and emergency mooring.
- In case of damage (float breach, cable damage), have repair plans and spare parts ready.
Additional Tips and Best Practices
Temperature Advantages: Water cooling may enhance module efficiency slightly; in hot climates, this is an added benefit.
Mitigating Biofouling and Algae: Over time, surfaces underwater may attract microbial growth—consider coatings or periodic cleaning.
Wildlife and Ecotoxicity: Understand impacts on aquatic ecosystems, shading effects, fish behavior, and maintain open passages or spacing to allow water movement.
Buffer Zones: Leave spacing to permit water flow, maintenance vessel passage, and avoid shoreline erosion.
Monitoring and Automation: Integrate robust SCADA, remote diagnostics, environmental sensors (temperature, wind, water level).
Insurance and Warranties: Secure proper insurance coverage for storms, hail, mechanical failure, and check warranty coverage for floats, modules, and inverters.
Why AccuSolar Floating Solar Systems?
Choosing AccuSolar means choosing floating solar systems designed to do more than just produce energy. They’re engineered to perform at the highest level. From project planning to installation, we manage every step with precision to maximize power output while reducing environmental impact.
Quality is at the core of everything we deliver. Our systems are built with premium materials and manufactured with care to ensure strength, stability, and longevity. Backed by an experienced team, AccuSolar gives you the confidence that your floating solar project will stand the test of time.
Floating Solar Farm Construction: Partner with AccuSolar
We’ve covered the complete process of bringing a floating solar farm to life, from initial concept to long-term operation. While the concept is powerful, the reality demands expertise. The longevity and efficiency of your system hinges on thoughtful design, rigorous execution, and consistent O&M. That’s where AccuSolar comes in.
We don’t just sell components; we design and manufacture durable, American-made floating solar systems that are meticulously tailored to your site’s unique environmental and operational needs. Whether you’re planning your first floating solar farm construction project or scaling up building floating solar panels for multiple sites, our team brings the technical knowledge and proven track record you need. Ready to start building your clean energy future?
Contact AccuSolar to get started on your next project.
This article was originally published on April 9, 2024 and has been updated on October 29. 2025 to provide the most accurate and relevant information.